
📌 학습 목표
- Thread에 대해 설명할 수 있다.
- Handler에 대해 설명할 수 있다.
- Looper에 대해 설명할 수 있다.
📝 Standard Mission
- Thread를 활용하여 타이머 만들어보기
- 시간이 흐를 때마다 TextView 업데이트해서 남은 시간 표시하기
- 설정한 시간 (예: 30초)가 지나면 타이머 종료 알리기
- (Optional) 종료하면 효과음 재생해보기 (SoundPool)
Thread를 사용해 total 값이 1씩 줄어들면서 timerTextView에 값이 업데이트 되도록 만들었다.
Thread에선 바로 뷰에 접근하진 못하므로 Handler를 활용해 뷰를 다룰 수 있게 구현했다.
MainActivity.kt
package com.example.homework7

import android.app.Activity
import android.media.SoundPool
import android.os.*
import android.widget.SeekBar
import androidx.appcompat.app.AppCompatActivity
import com.example.homework7.databinding.ActivityMainBinding
import kotlin.concurrent.thread

class MainActivity : AppCompatActivity() {

    private lateinit var binding: ActivityMainBinding
    private var total = 15 // 전체 시간 (초 기준)
    private var started = false

    private val soundPool = SoundPool.Builder().build()
    private var tickingSound: Int? = null
    private var bellSound: Int? = null

    override fun onCreate(savedInstanceState: Bundle?) {
        super.onCreate(savedInstanceState)
        binding = ActivityMainBinding.inflate(layoutInflater)
        setContentView(binding.root)

        startTimer()
        stopTimer()
        initSounds() // 사운드 로드
    }

    private fun initSounds() {
        tickingSound = soundPool.load(this, R.raw.timer_ticking, 1)
        bellSound = soundPool.load(this, R.raw.timer_bell, 1)
    }

    private fun startTimer() {
        // 핸들러를 사용하면 원래 스레드가 아닌 다른 스레드에서도 뷰를 다룰 수 있음
        val handler = Handler(Looper.getMainLooper())

        binding.startBtn.setOnClickListener {
            if (started == false) {
                started = true

                Thread() {
                    while(started) {
                        Thread.sleep(1000)
                        if (total == 0) {
                            started = false
                            soundPool.autoPause()
                            bellSound?.let { soundId ->
                                soundPool.play(soundId, 1F, 1F, 0, 0, 1F)
                            }
                        }
                        if (started) {
                            total -= 1
                            handler.post {
                                val minute = String.format("%02d", total / 60)
                                val second = String.format("%02d", total % 60)
                                binding.timer.text = "$minute:$second"

                                tickingSound?.let { soundId ->
                                    soundPool.play(soundId, 1F, 1F, 0, -1, 1F)
                                }
                            }
                        }
                    }
                }.start()
            }
        }
    }

    private fun stopTimer() {
        binding.stopBtn.setOnClickListener {
            started = false
            soundPool.autoPause()
        }
    }
}
activity_main.xml

<?xml version="1.0" encoding="utf-8"?>
<androidx.constraintlayout.widget.ConstraintLayout xmlns:android="http://schemas.android.com/apk/res/android"
    xmlns:app="http://schemas.android.com/apk/res-auto"
    xmlns:tools="http://schemas.android.com/tools"
    android:layout_width="match_parent"
    android:layout_height="match_parent"
    tools:context=".MainActivity">

    <TextView
        android:id="@+id/timer"
        android:layout_width="wrap_content"
        android:layout_height="wrap_content"
        android:layout_marginBottom="100dp"
        android:text="00:15"
        android:textSize="100sp"
        android:textStyle="bold"
        app:layout_constraintBottom_toBottomOf="parent"
        app:layout_constraintEnd_toEndOf="parent"
        app:layout_constraintStart_toStartOf="parent"
        app:layout_constraintTop_toTopOf="parent" />

    <Button
        android:id="@+id/startBtn"
        android:layout_width="150dp"
        android:layout_height="60dp"
        android:layout_marginBottom="80dp"
        android:backgroundTint="@color/pink"
        android:text="시작"
        android:textSize="20sp"
        android:textStyle="bold"
        app:layout_constraintBottom_toBottomOf="parent"
        app:layout_constraintEnd_toStartOf="@id/stopBtn"
        app:layout_constraintStart_toStartOf="parent" />

    <Button
        android:id="@+id/stopBtn"
        android:layout_width="150dp"
        android:layout_height="60dp"
        android:layout_marginBottom="80dp"
        android:backgroundTint="@color/pink"
        android:text="멈춤"
        android:textSize="20sp"
        android:textStyle="bold"
        app:layout_constraintBottom_toBottomOf="parent"
        app:layout_constraintEnd_toEndOf="parent"
        app:layout_constraintStart_toEndOf="@id/startBtn" />

</androidx.constraintlayout.widget.ConstraintLayout>
❓ SoundPool 사용법
SoundPool을 사용하기 위해선, 먼저 soundPool을 Build 해준다.
private val soundPool = SoundPool.Builder().build()
Sound는 raw 폴더를 만들어 raw 형식으로 넣어주면 된다.

그리고 나선, 아래처럼 play()함수를 이용해 파일을 재생시킨다.
soundPool.play(soundId, 1f, 1f, 0, 0, 1f)
play의 파라미터를 살펴보자면 ,,,
int play (int soundID, float leftVolume, float rightVolume, int priority, int loop, float rate)
- soundID : 재생시킬 파일의 resID
- leftVolume : 왼쪽 볼륨 크기 (range : 0.0 ~ 1.0)
- rightVolume : 오른쪽 볼륨 크리 (range : 0.0 ~ 1.0)
- priority : 우선순위 ( 0이 가장 낮음을 나타냅니다)
- loop : 재생횟수입니다. (0일 경우 1번만 재생 -1일 경우에는 무한반복)
- rate : 재생속도입니다.0.5로 할 경우 2배 느리게 재생되고 2.0으로 할 경우 2배 빠르게 재생됩니다. (range : 0.5 ~ 2.0)
SoundPool | Android Developers
developer.android.com
📌 실행 화면
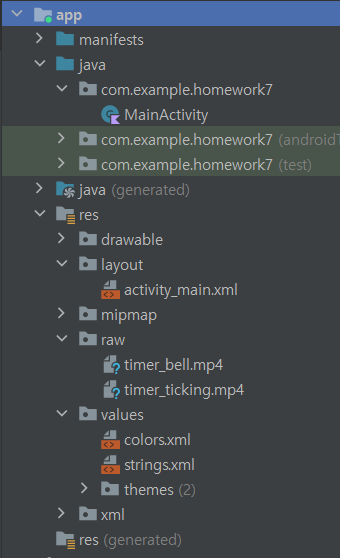
📌 프로젝트 구성
'🍞 대외활동 & 부트캠프 > IT연합동아리 UMC' 카테고리의 다른 글
| [UMC] 3rd UMC 해커톤 회고 (0) | 2022.11.22 |
|---|---|
| [UMC] Android 8주차 워크북 (Database) (0) | 2022.11.21 |
| [UMC] Android 6주차 워크북 (고급 Layout과 View) (0) | 2022.11.07 |
| [UMC] Android 5주차 워크북 (RecyclerView) - 메모장 앱 (0) | 2022.10.24 |
| [UMC] Android 5주차 워크북 (ListView) (0) | 2022.10.23 |